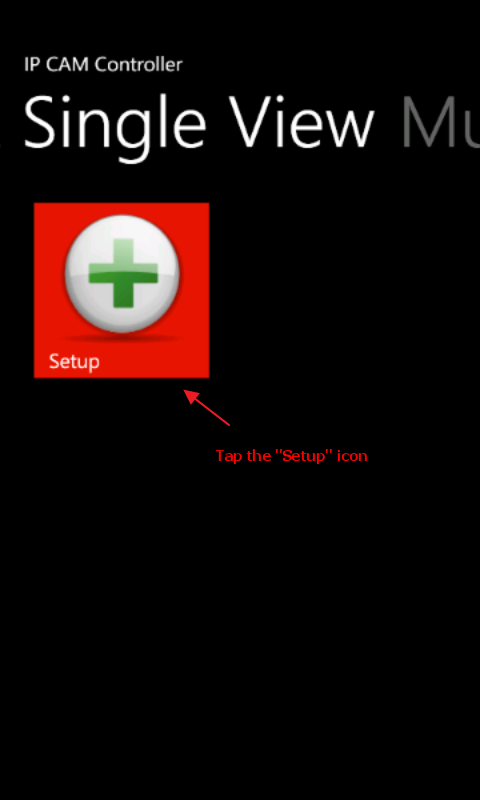
Add your first camera
a) Tap the "Setup" icon in main screen
b) Input camera info and save it
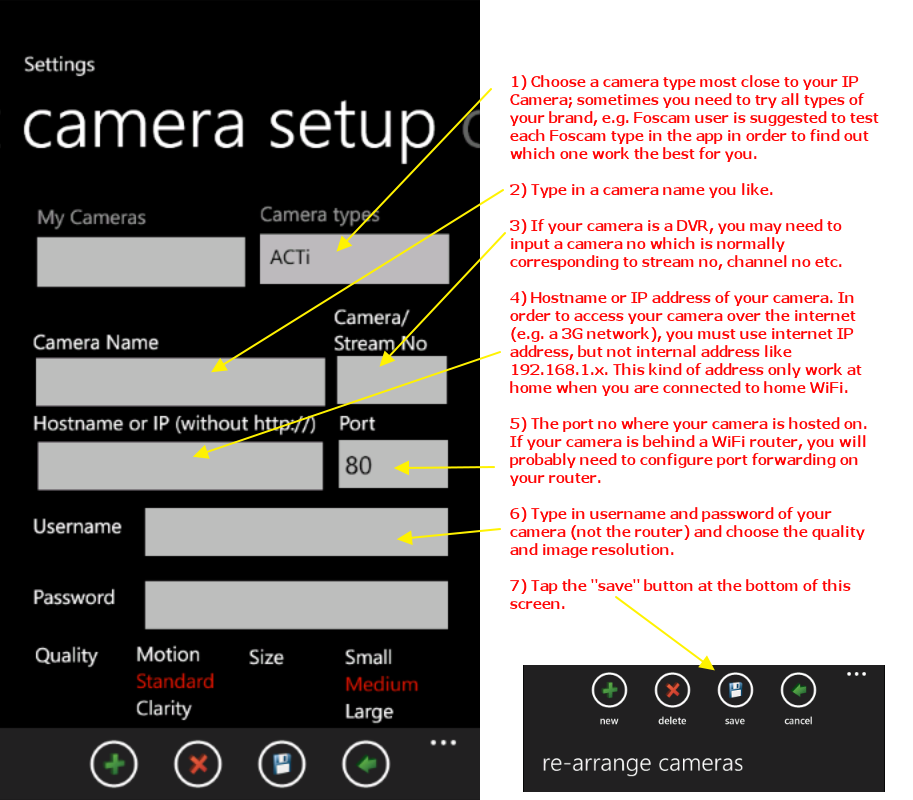
1) Choose a camera type most close to your IP Camera; sometimes you need to try all types of your brand, e.g. Foscam user is suggested to test each Foscam type in the app in order to find out which one work the best for you.
2) Type in a camera name you like.
3) If your camera is a DVR, you may need to input a camera no which is normally corresponding to stream no, channel no etc.
4) Hostname or IP address of your camera. In order to access your camera over the internet (e.g. a 3G network), you must use internet IP address, but not internal address like 192.168.1.x. This kind of address only work at home when you are connected to home WiFi.
5) The port no where your camera is hosted on. If your camera is behind a WiFi router, you will probably need to configure port forwarding on your router.
6) Type in username and password of your camera (not the router) and choose the quality and image resolution.
7) Tap the "save" button at the bottom of this screen.
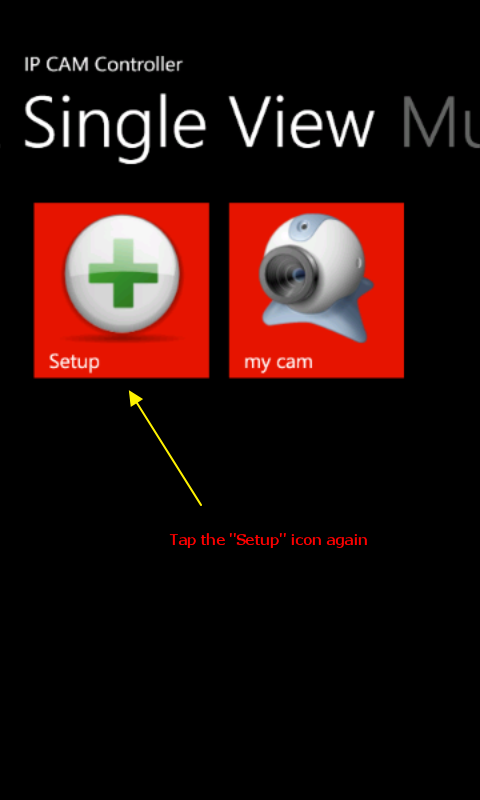
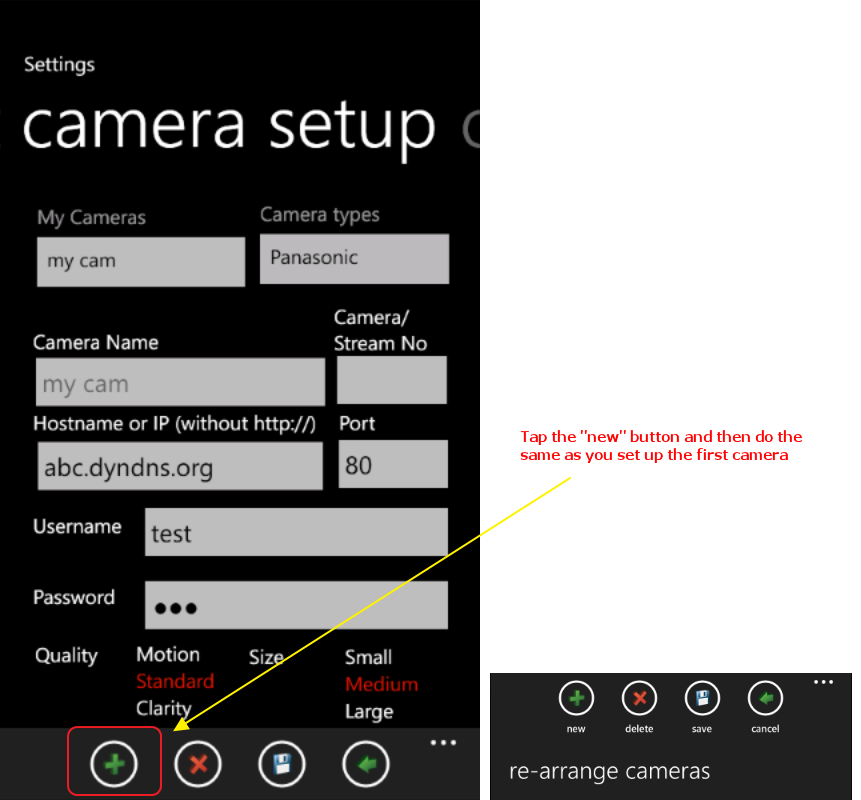
Add the 2nd camera
a) Tap the "Setup" icon again
b) Tap the "new" button and do the same as you set up the first camera, and don't forget to tap the "save" button to save it
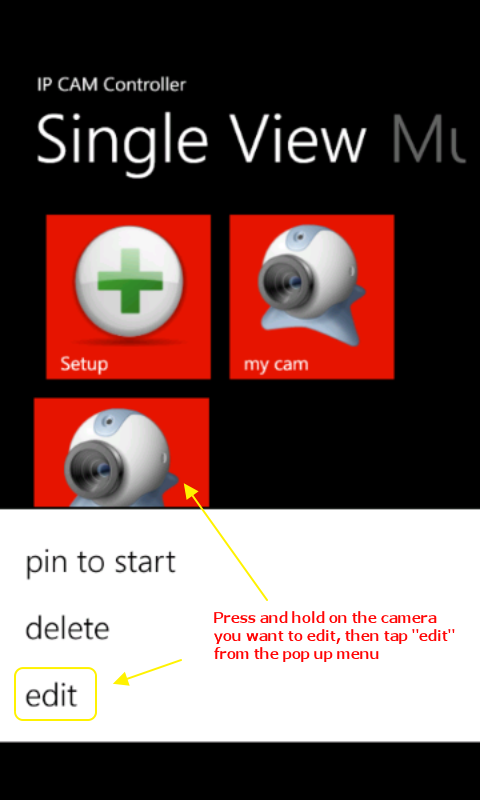
Edit a camera
a) Press and hold on the camera you want to edit, then choose "edit" (this is new menu item from v2.5.3, older version please go to step c) from the pop up menu.
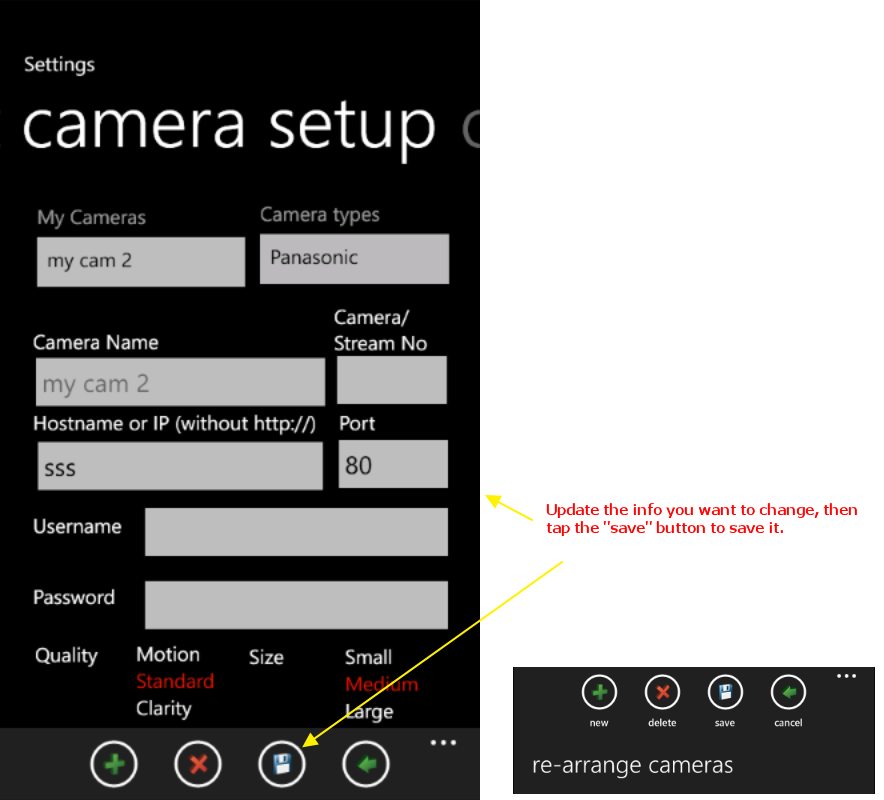
b) Update the camera info, then tap the "save" button
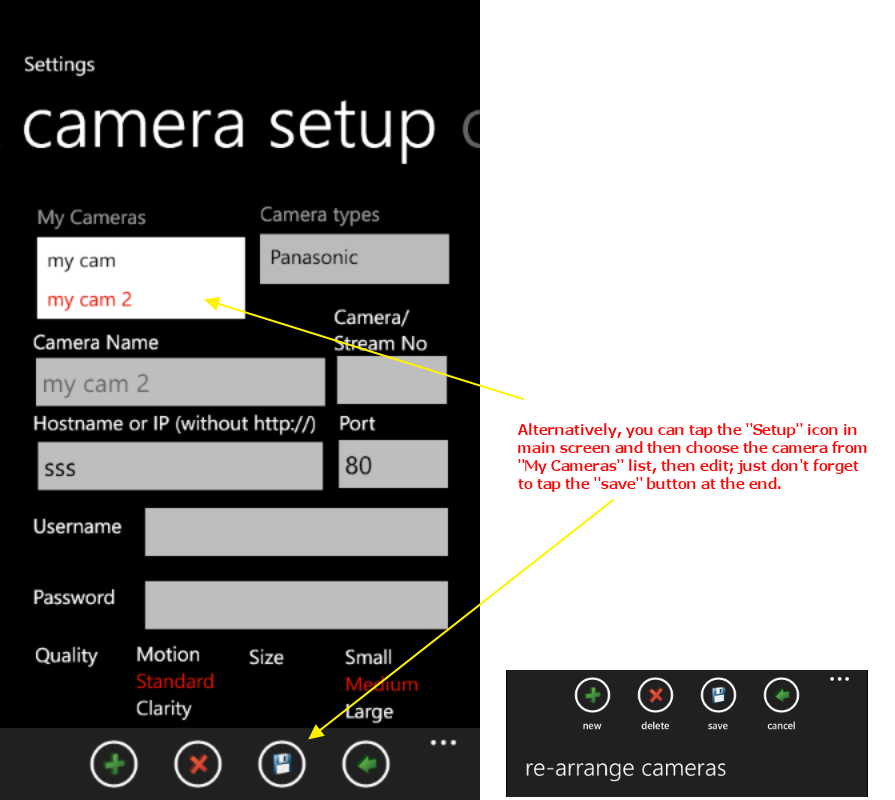
c) Alternatively, you can tap the "Setup" icon in main screen and then choose the camera from "My Cameras" list; then go ahead, but don't forget to tap the "save" button at the end.
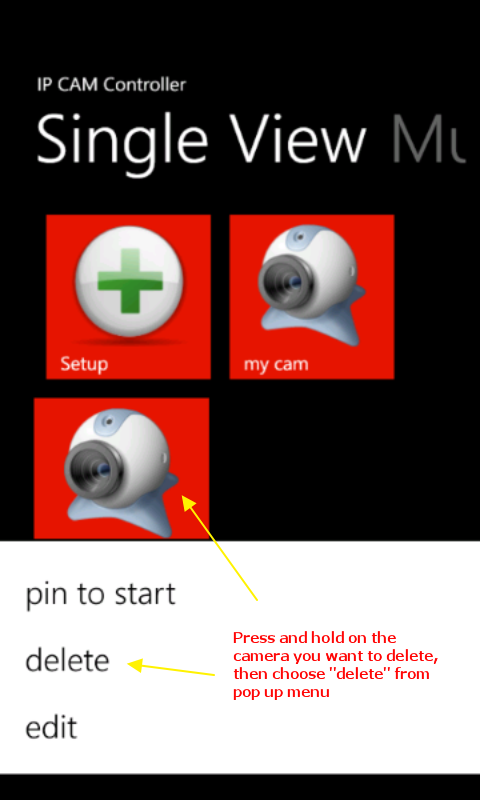
Delete a camera
Press and hold a camera in the main screen, then choose "delete" from pop up menu.
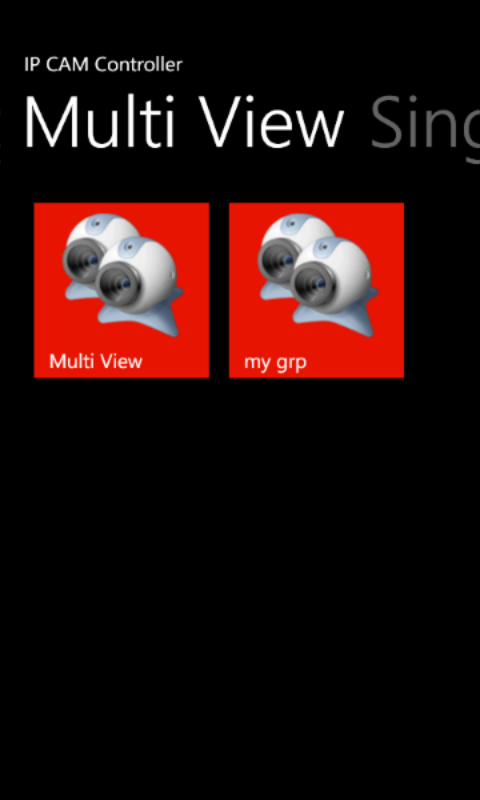
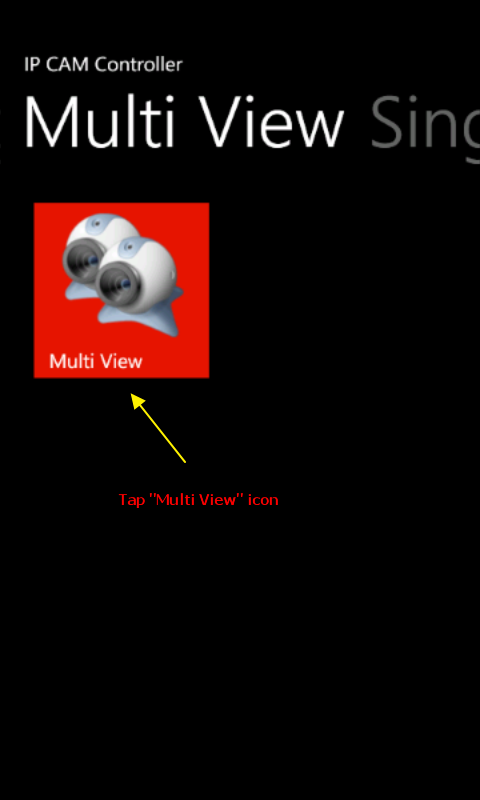
Add a multi-view grouping
a) Tap the "Multi View" icon in main screen
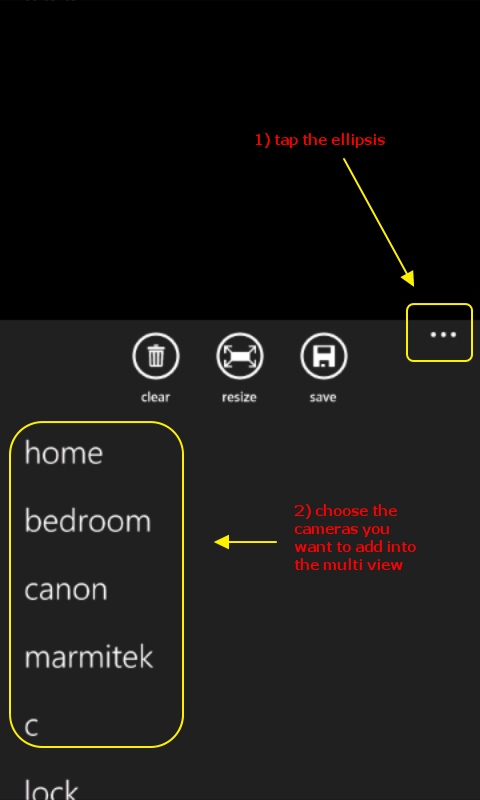
b) Tap the ellipsis (...) from bottom, then choose your cameras from the list
c) Tap the "save" icon (only for paid version, free trial could not save the view)
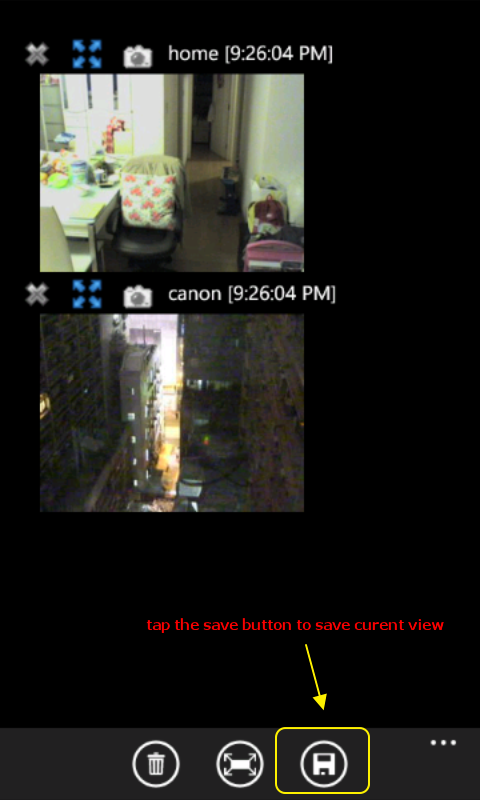
d) Input a name for the grouping

e) The view will then be saved for further usage